Standout Display User guide

Last updated: 15.06.2026
1. SAFETY INSTRUCTIONS

To ensure the longevity of your device and your personal safety, please adhere to the following guidelines:

  • Environment: Use in ambient temperatures between -10°C and +40°C with relative humidity ≤ 80%.
  • Ventilation: Do not place the device in a closed, non-thermal case or box during operation. Ensure proper ventilation and heat dissipation.
  • Sunlight & Heat: Avoid direct sunlight and keep away from heat sources.
  • Handling: Prevent excessive moisture and dust to avoid circuit board corrosion.
  • Cleaning: Turn off and unplug the monitor before cleaning. Use a soft, dry, or slightly damp microfiber cloth. Avoid benzene, thinner, or ammonia.
2. PRODUCT OVERVIEW

PACKAGE CONTENTS

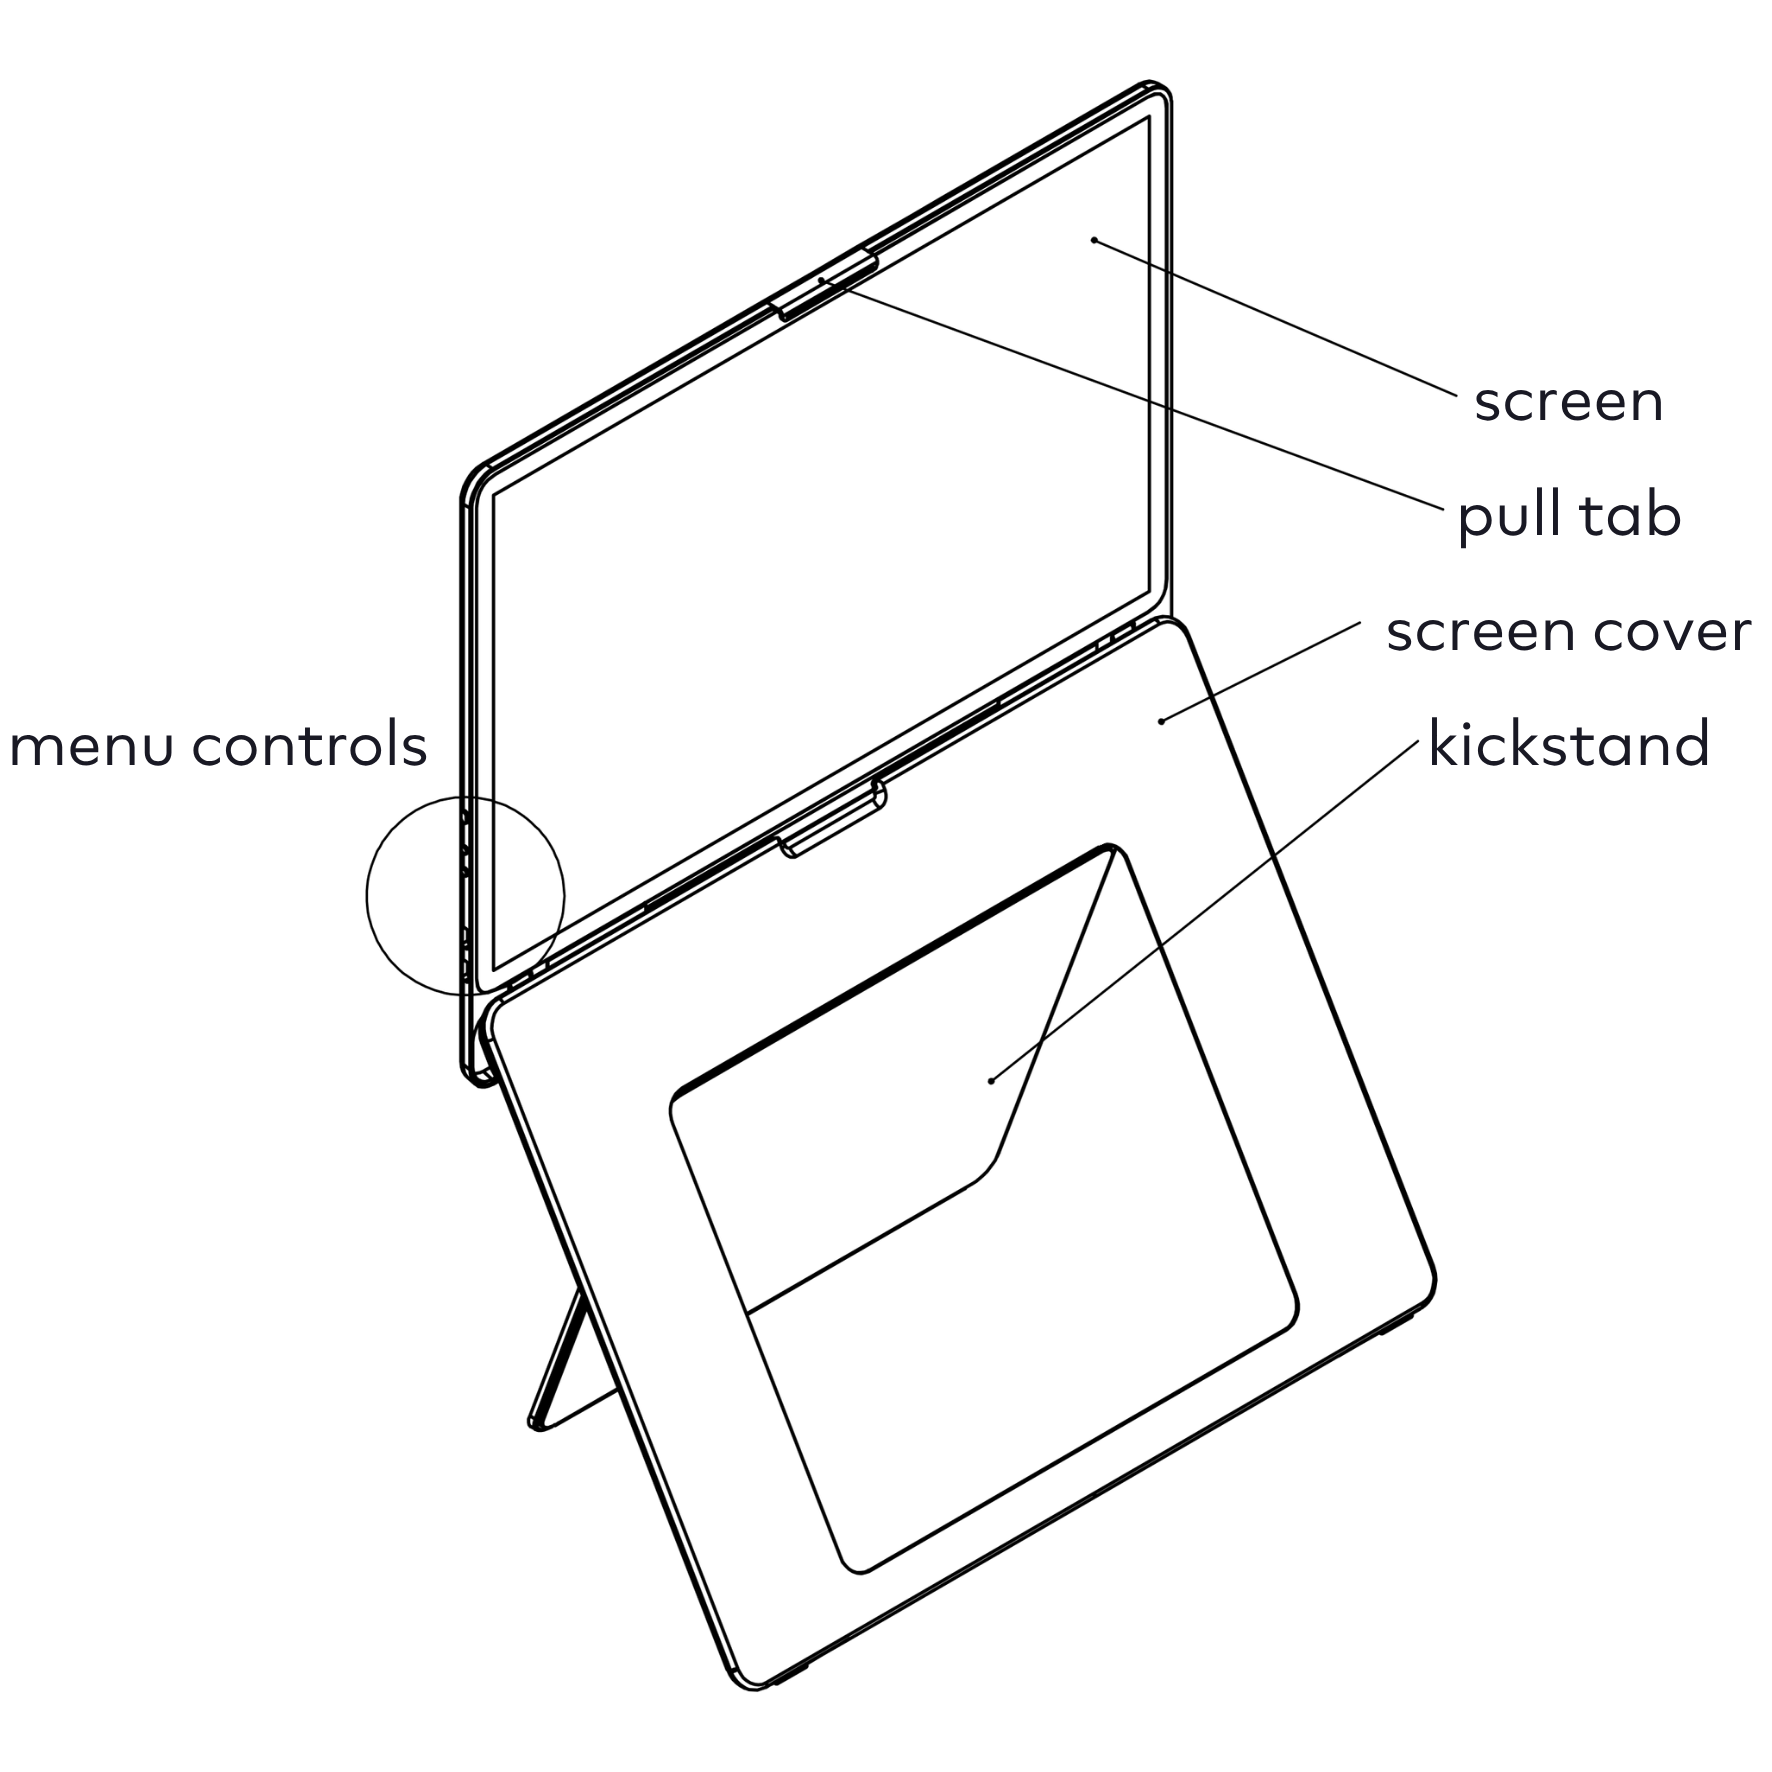
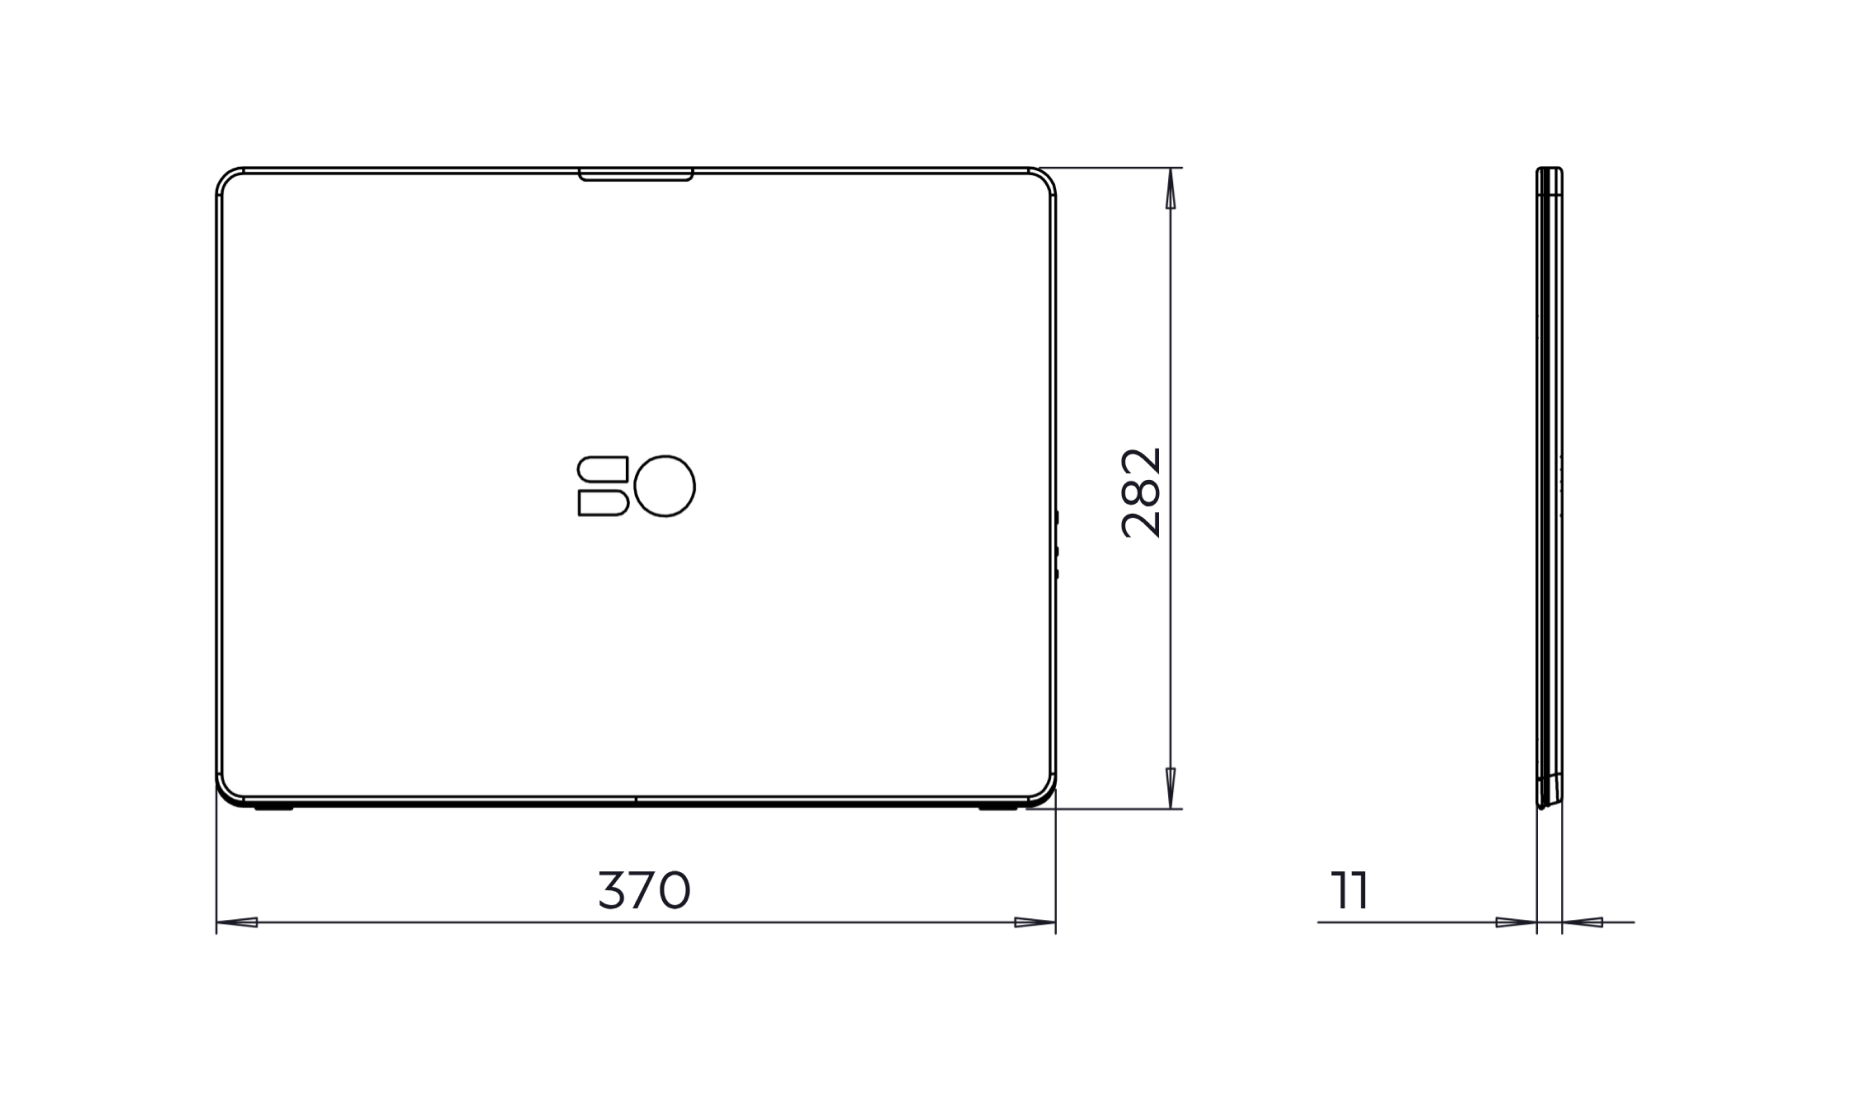
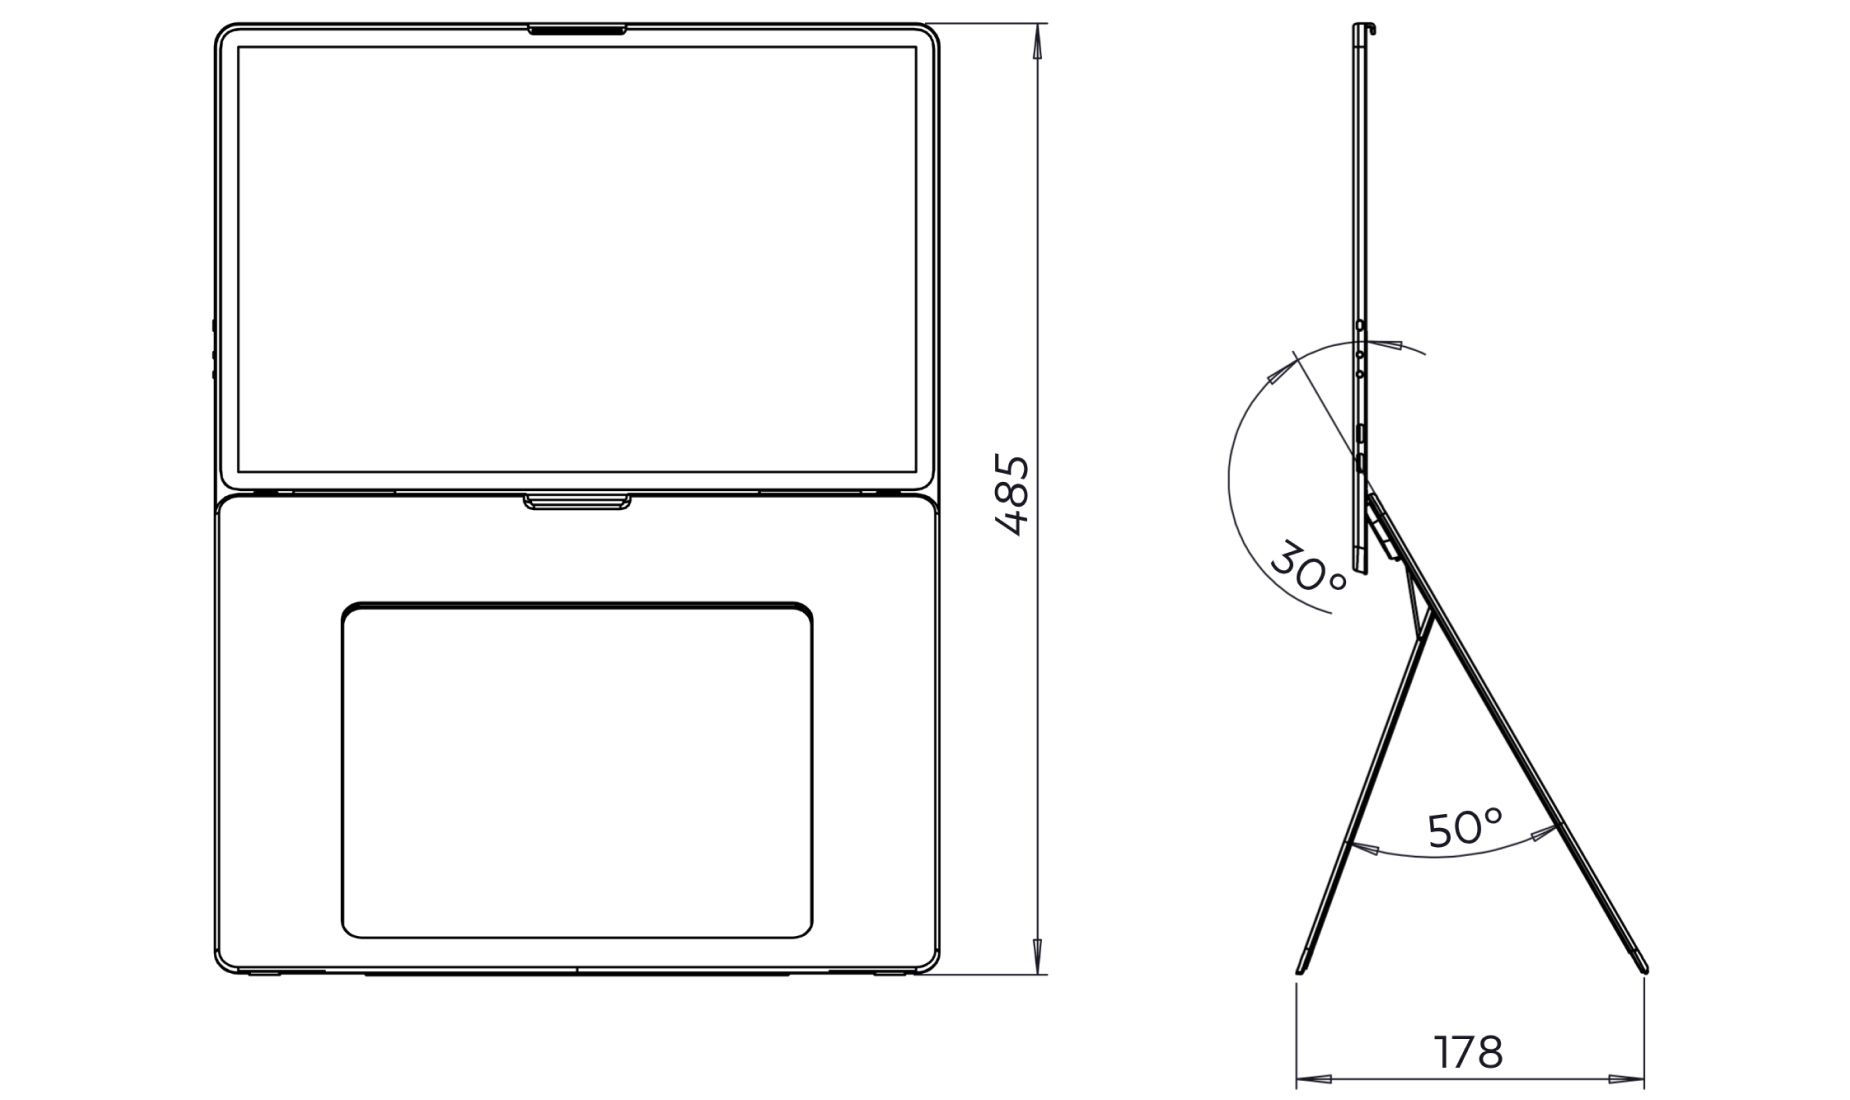
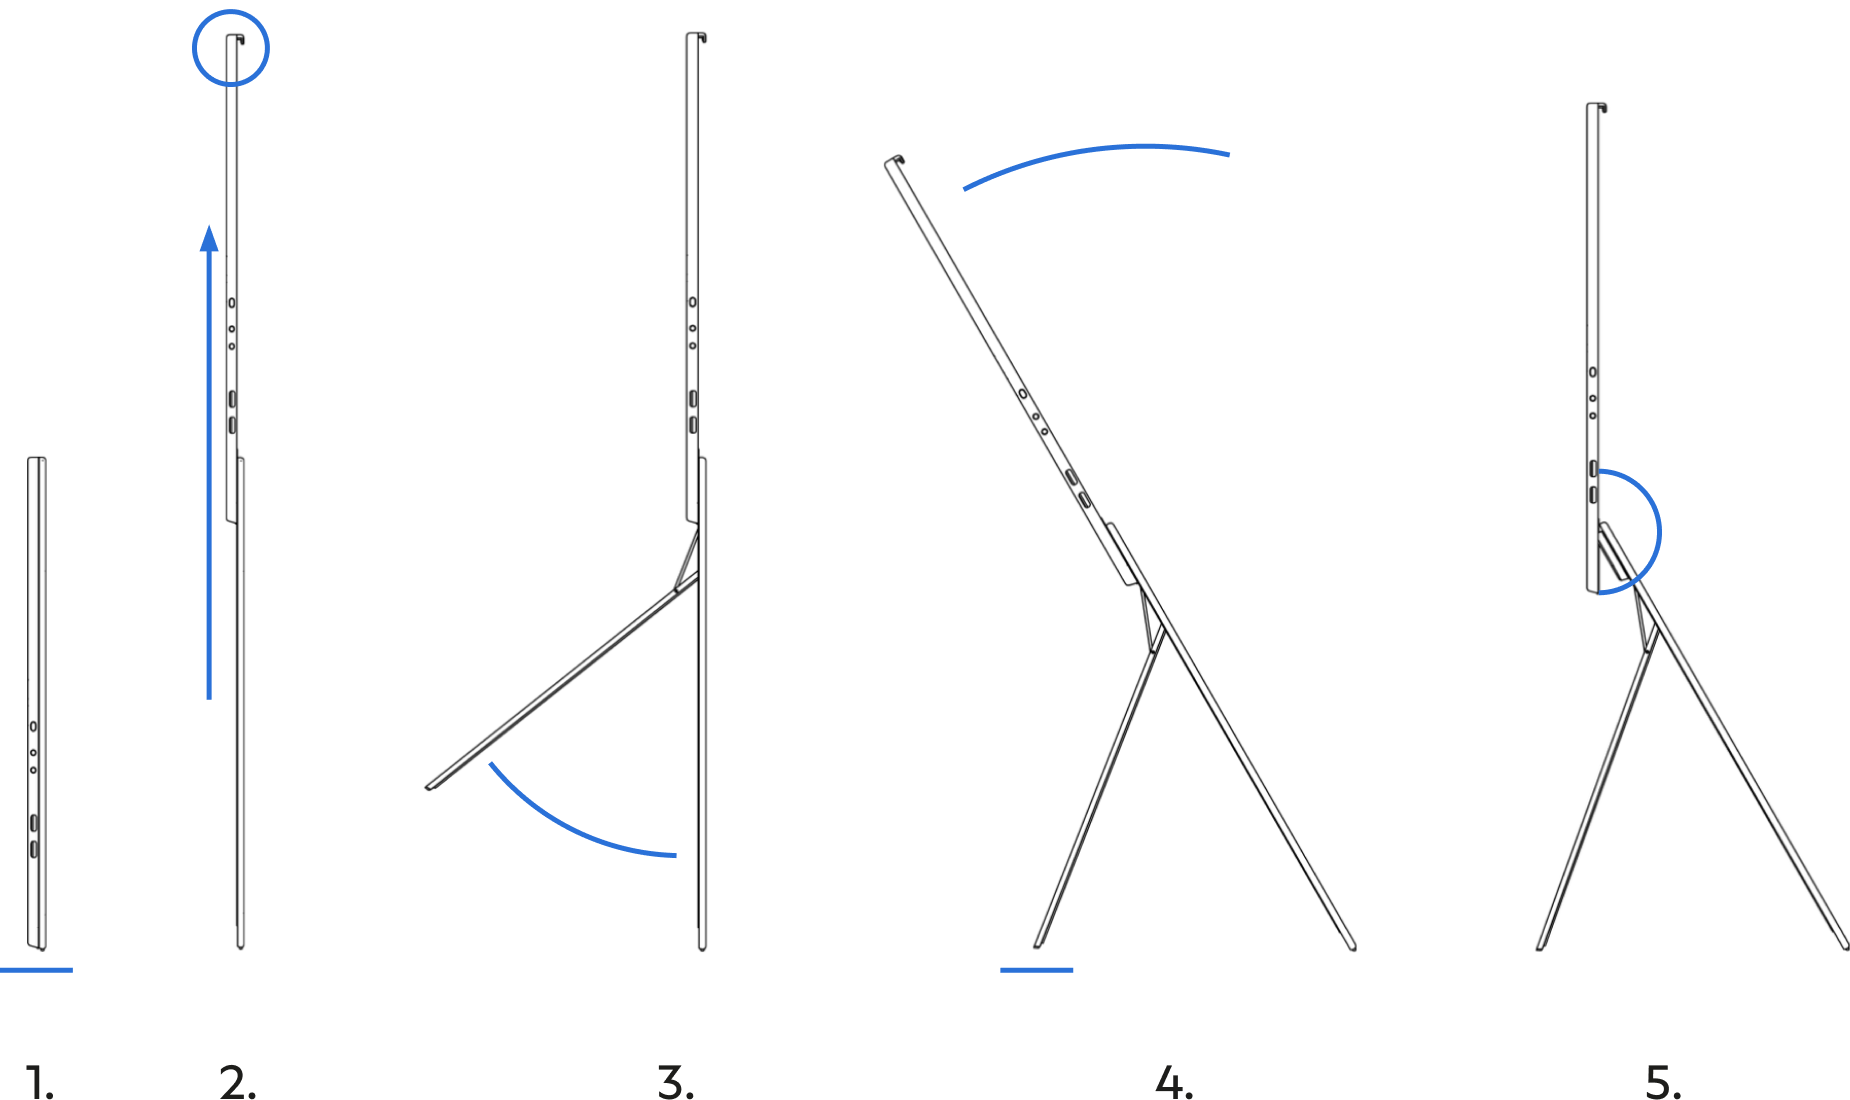
1 x Standout Display

1 x 0.4m USB-C - angled USB-C cable

1 x 2m USB-C - USB-C cable

1 x Protective sleeve

1 x User manual

MAIN FEATURES

DIMENSIONS (mm)

Ports and buttons

  1. Menu Button: Open the OSD menu / Select highlighted options / Hold 3s to go back.
  2. Up Button: Increase brightness (outside menu)/ Navigate Up.
  3. Down Button: Decrease brightness (outside menu)/ Navigate Down.
  4. & 5. UCB-C Ports: Ports supporting both power delivery and video output
3. SETUP INSTRUCTIONS
  1. Positioning: Place the device upright on a flat, stable surface with the ports and buttons facing left.
  2. Opening: Pull the screen up by holding the black tab located on the top edge of the device.
  3. Kickstand: The spring-loaded kickstand will pop out automatically.
  4. Placement: Lean the device back so the kickstand rests on the table.
  5. Adjustment: Set your preferred viewing angle by adjusting the screen tilt. Make sure the screen is fully extended before doing so.
4. CONNECTING THE DISPLAY

CONNECTION METHODS

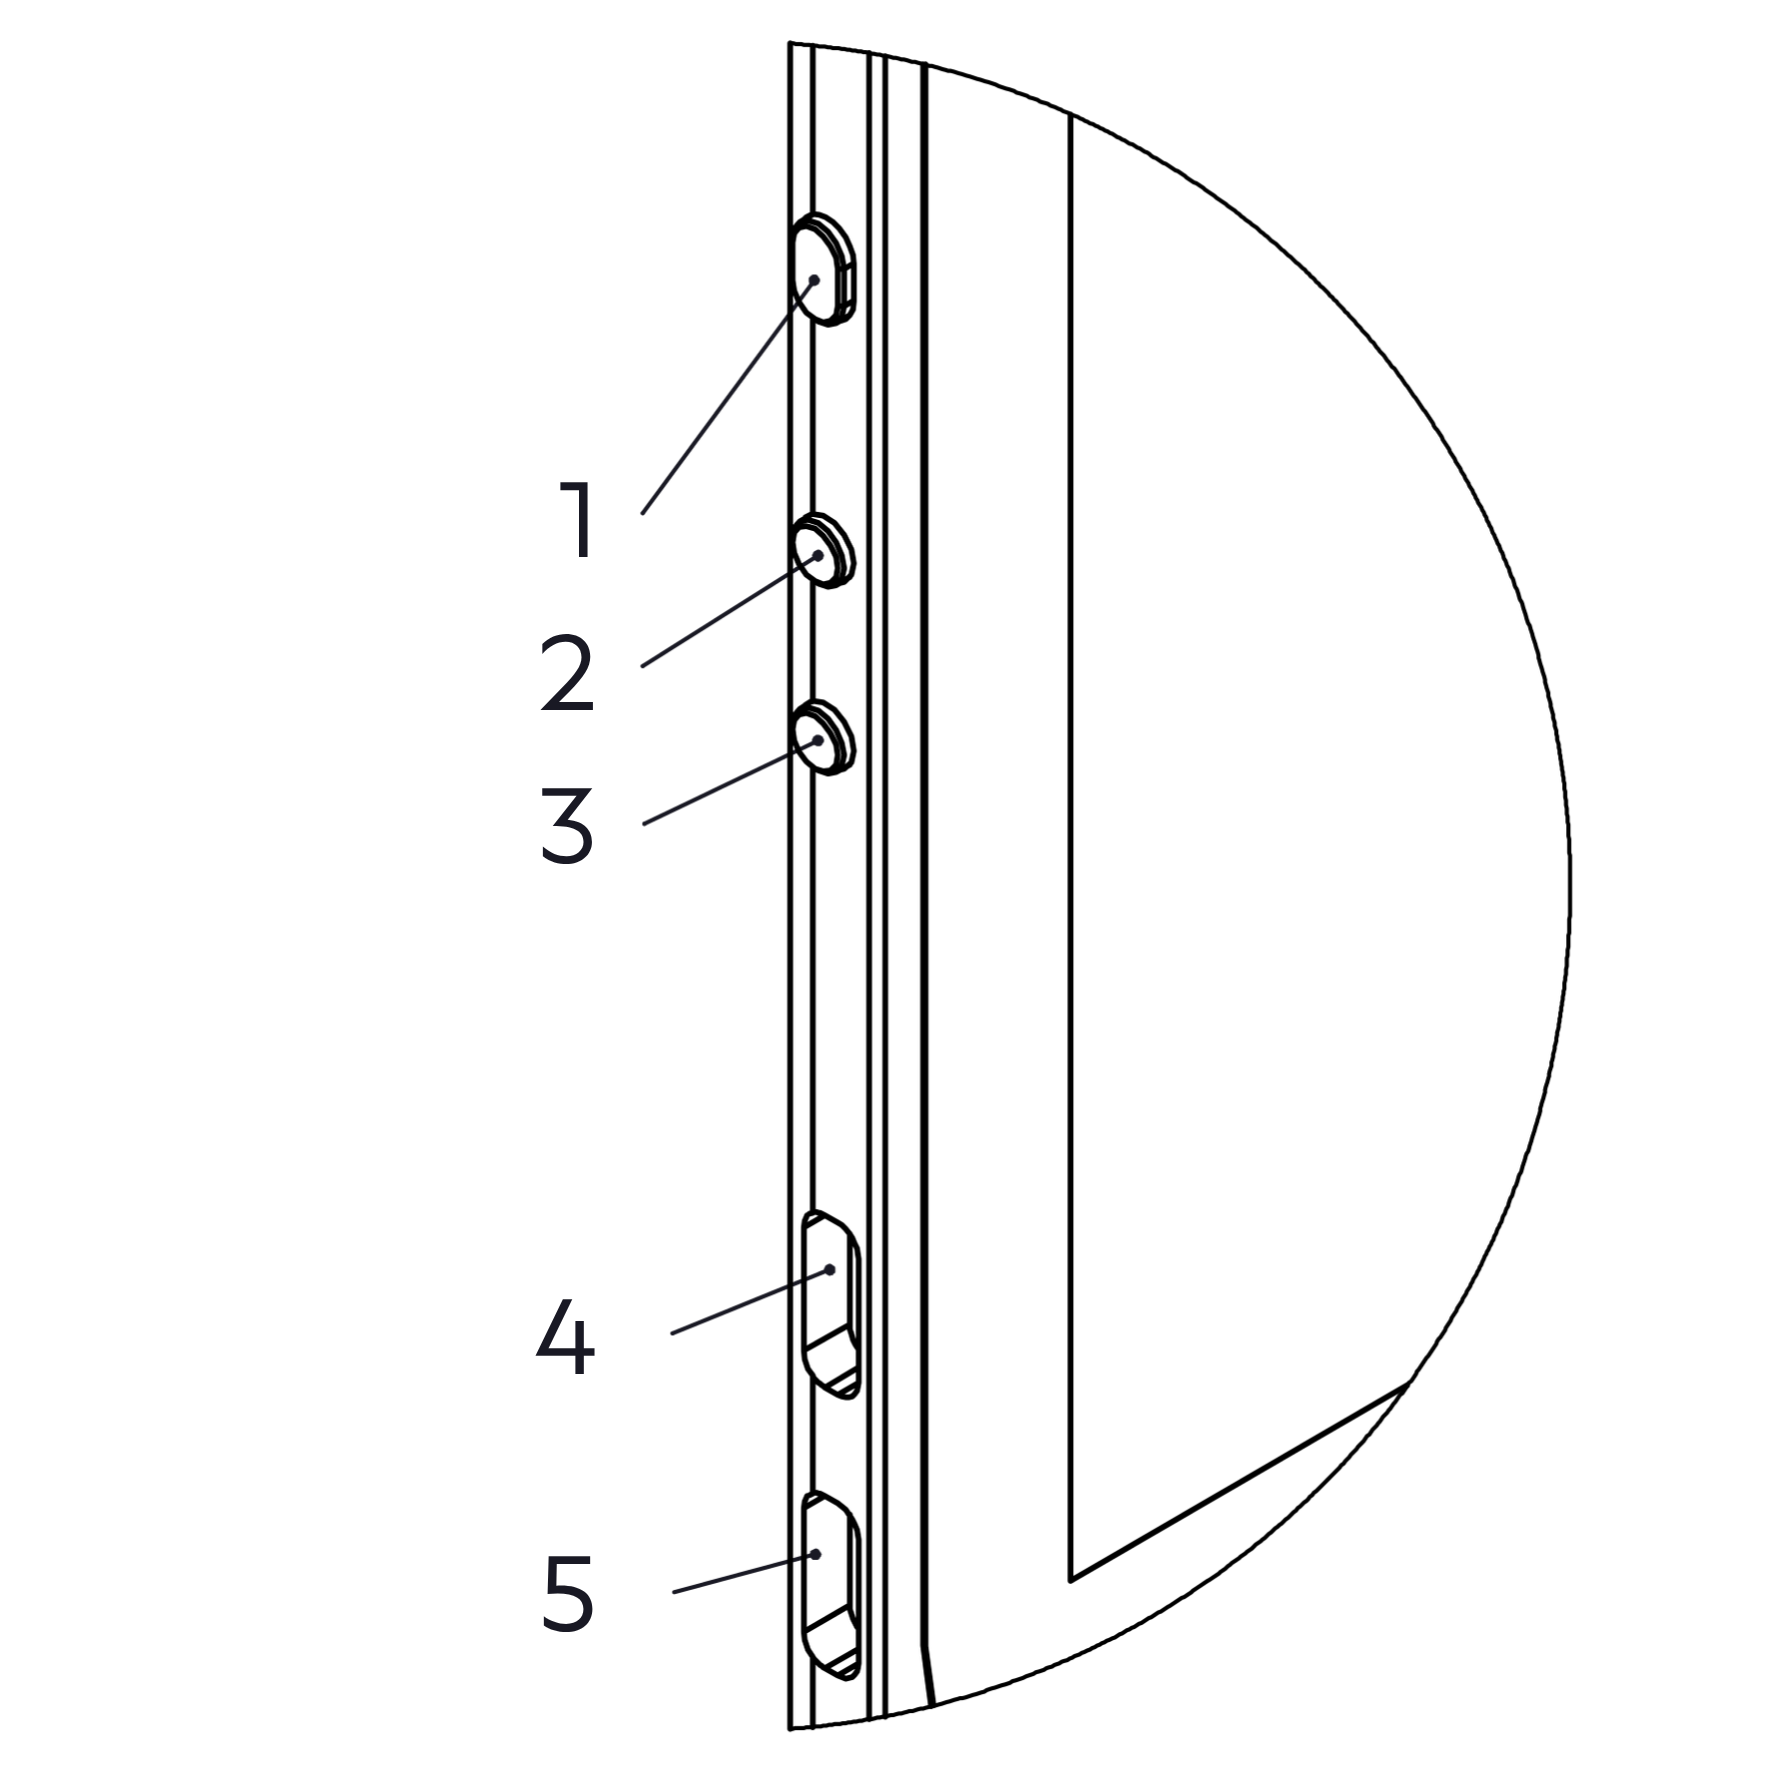
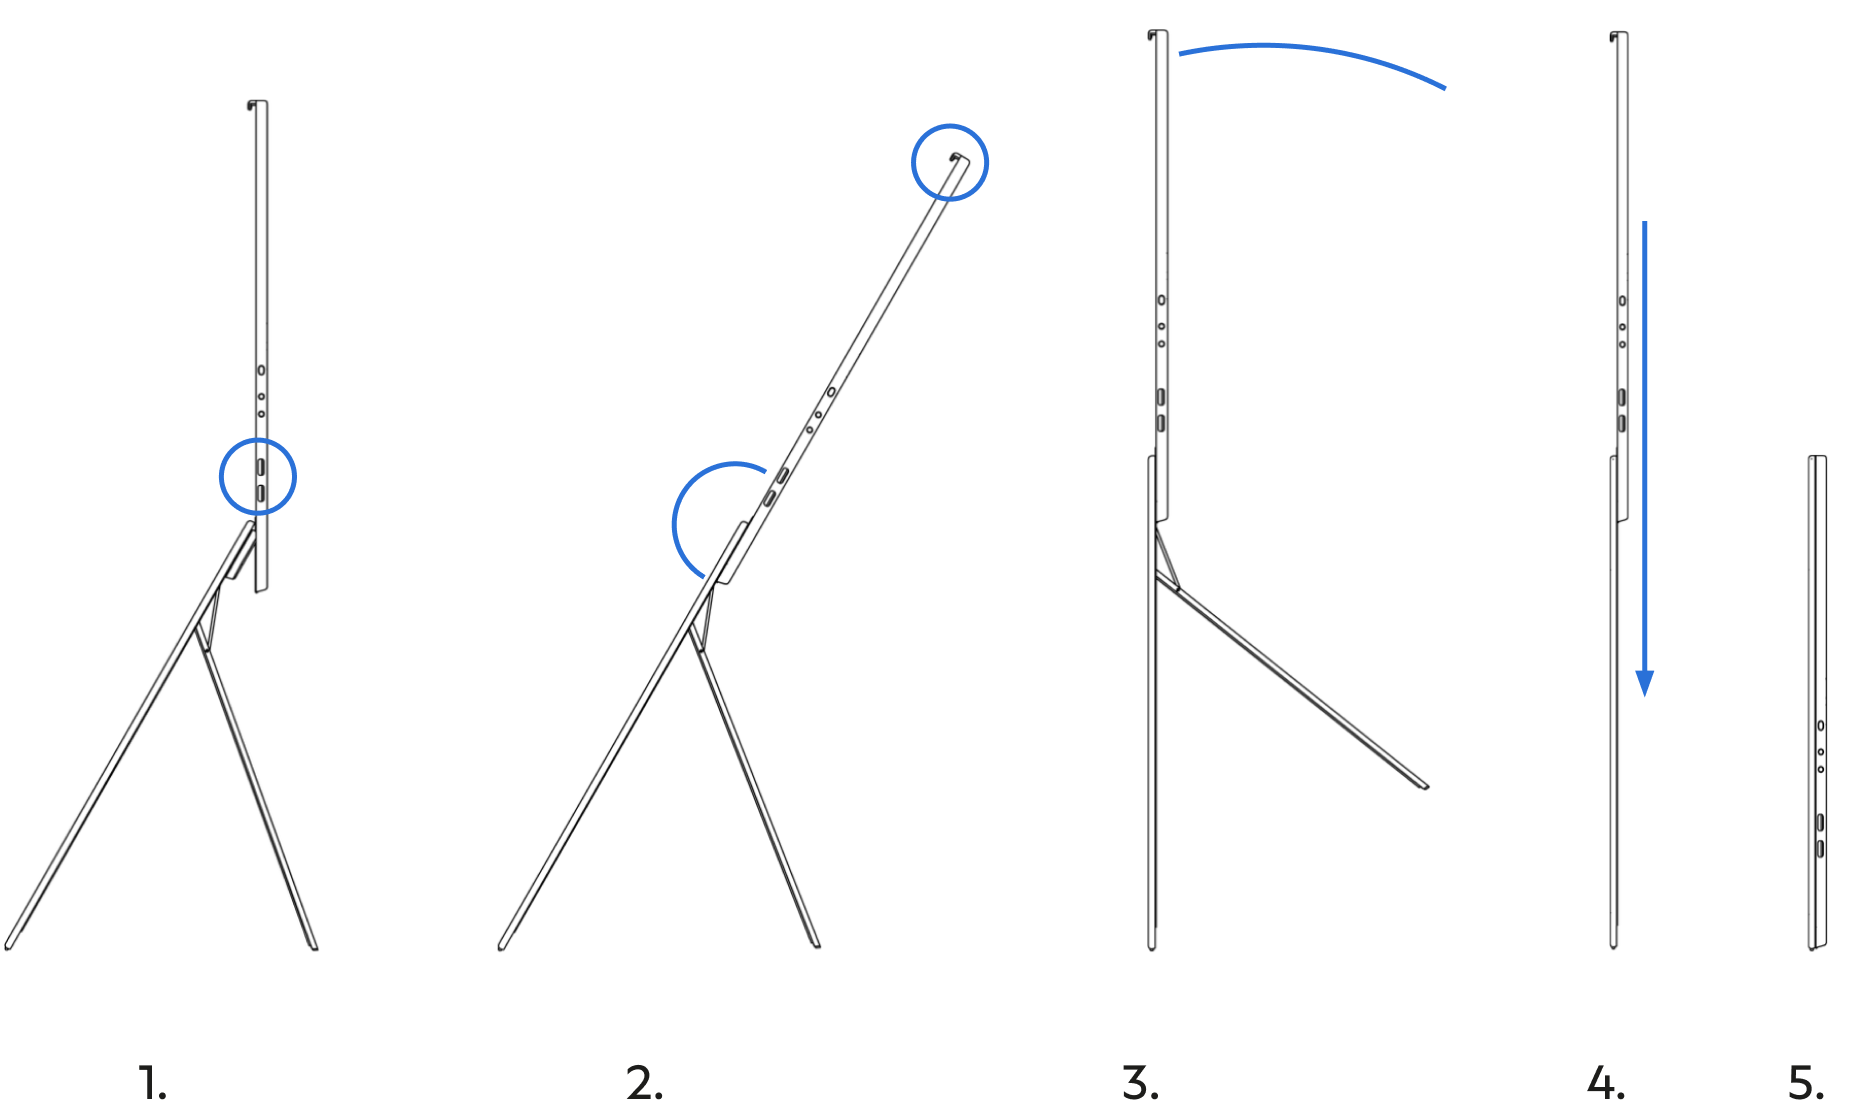
Single Cable Setup: Connect a full-featured USB-C cable between your laptop and either USB-C port on the display.

Note: Your laptop port must support DisplayPort Alt Mode or

Thunderbolt.

Power Passthrough: Every Standout Display supports power passthrough. Connect an external power source to the display (your laptop adapter or a power bank) and it will deliver power to your laptop while you work.

Brightness Boost (16” Nova only): Connecting external power (60W PD adapter recommended) also unlocks extra brightness, delivering up to 700 nits at full brightness.

BRIGHTNESS & POWER

16" Model

Without Extra Power: Starts at 50%, adjustable up to 100%*

With Extra Power: Jumps to 75%, adjustable up to 100%

16" Nova Model

Without Extra Power: Starts at 20%, adjustable up to 35%*

With Extra Power: Jumps to 50%, adjustable up to 100%

Note: The 16" can reach its full brightness on power alone from most laptops. The 16" Nova uses a 4K Mini-LED panel with a much higher peak brightness. This panel draws significantly more power than a laptop can supply, and external power is needed to unlock its full brightness.

PHONE AS A WEBCAM (MAGSAFE)

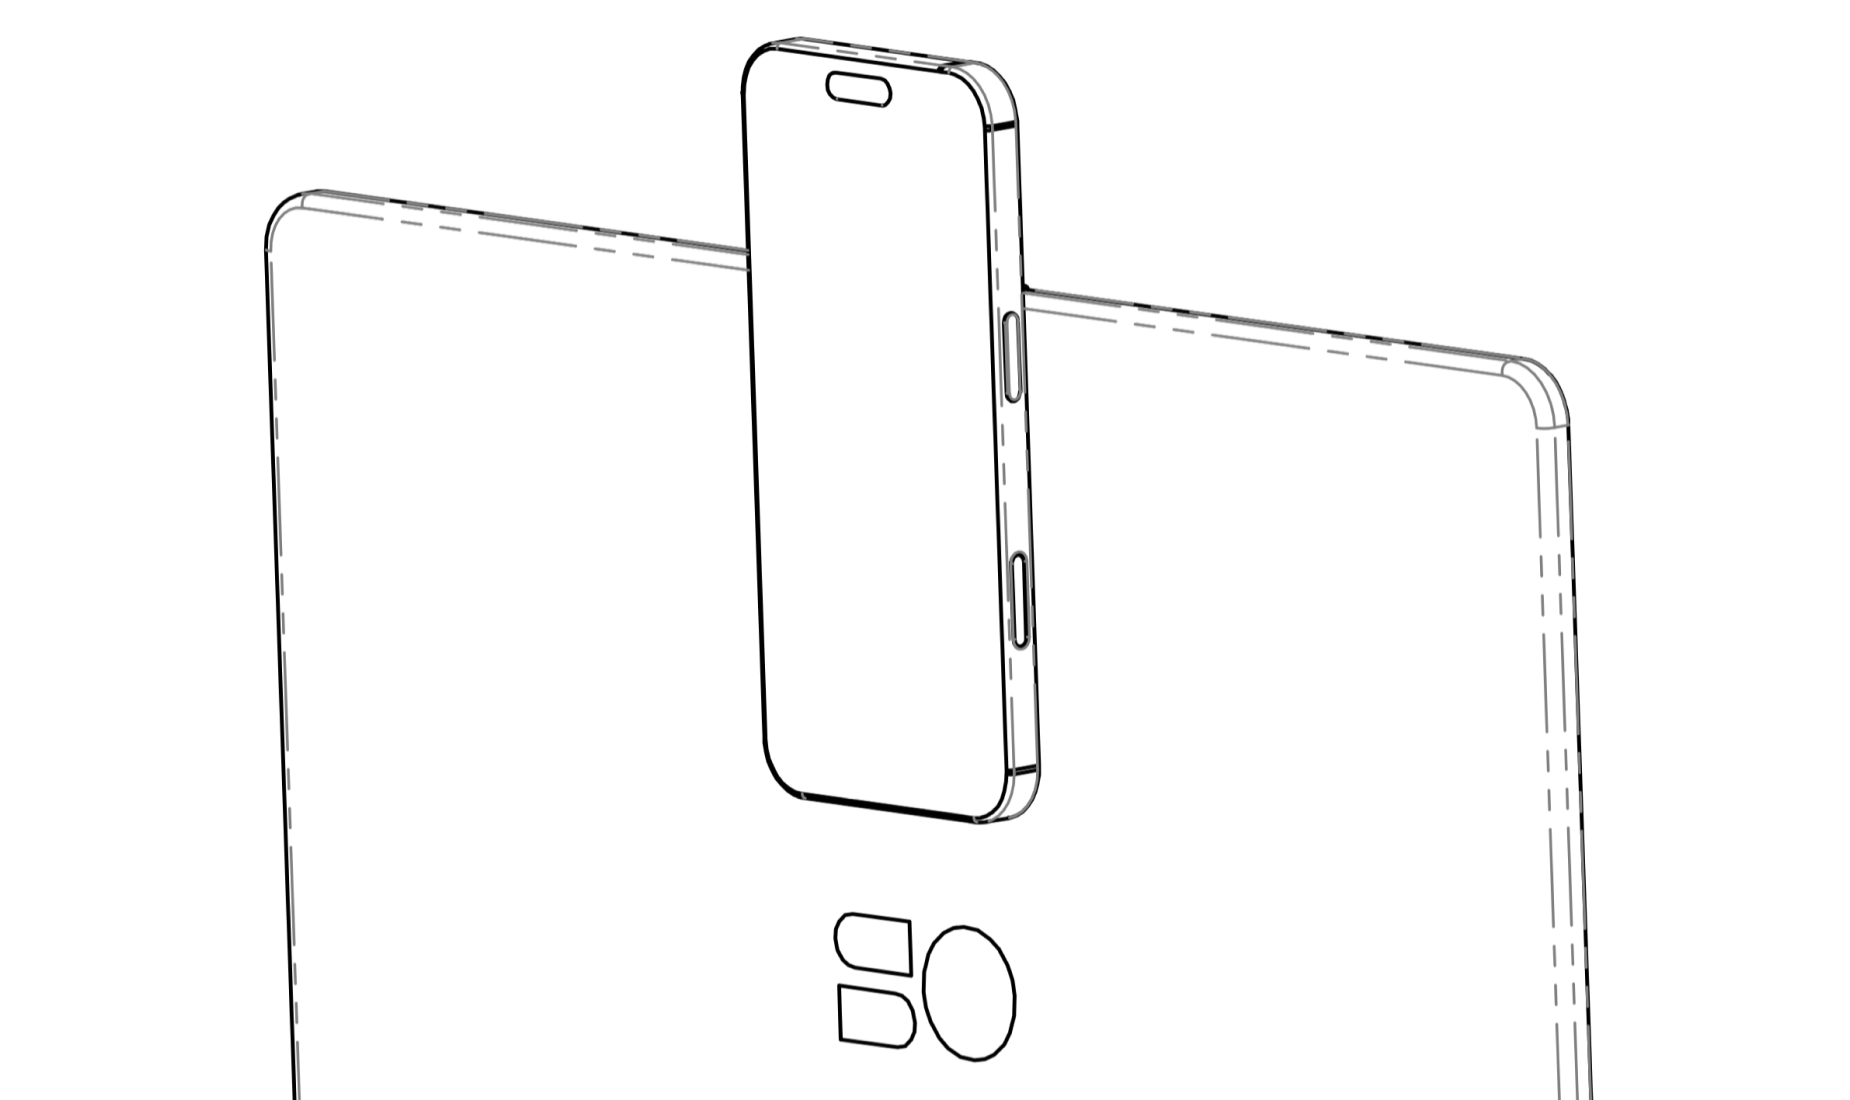
To use your phone (e.g., for camera continuity):

  1. Make sure that your phone or case supports MagSafe.
  2. Attach your phone to the magnetic back face of the display and ensure it's secure before letting go of your phone.
  3. Enable your phone as a webcam

    • Mac & iPhone: Your iPhone camera is automatically available via the native Continuity Camera feature.
    • Windows & Android: Connect your phone via Bluetooth and use Phone Link. Alternatively, use a third-party app.Note: MagSafe mount does not charge your phone.

Note: MagSafe mount does not charge your phone.

5. NAVIGATING OSD MENU

The On-Screen Display (OSD) allows you to adjust basic settings:

  • Enter Menu: Press the Menu button.
  • Navigate: Use the Up/Down buttons to scroll through options.
  • Select: Press the Menu button to confirm a selection.
  • Back: Press the Menu button for 3s.
  • Brightness Shortcut: When the menu is not visible, use the
  • Up/Down buttons to directly adjust brightness.
6. CLOSING AND STORAGE
  1. Disconnect - Remove all USB-C cables.
  2. Reset Tilt - Grab the black tab and tilt the screen back to its original alignment.
  3. Slide Down - While holding the tab, lift the device up and towards you so the sliding mechanism is perpendicular to the surface.
  4. Close - Slide the screen down by holding the black tab. The kickstand will close automatically.
  5. Protection - Store in the protective sleeve.

7. TROUBLESHOOTING
  • No Signal or Power - Ensure the USB-C cable is full-featured. Verify your laptop port supports video output (DisplayPort Alt Mode or Thunderbolt).
  • No Picture or Screen Flickering - The device may not be receiving enough power from the laptop. Connect an external min. 30W PD power adapter.
  • Limited Brightness - Connect external power to the second USB-C port to unlock Brightness Boost mode (16” Nova only).
9. WARRANTY & RETURNS

Your Standout Display is covered by a 2-year limited warranty against defects in materials and workmanship under normal use. If defective, we will repair or replace the unit at our discretion. This warranty does not cover damage from accidents, misuse, unauthorised modifications, or normal wear and tear.

To make a claim, contact us with proof of purchase at

hello@standout.so

10. SUPPORT

Questions or issues?

We’re here: hello@standout.so

11. COMPLIANCE

FCC COMPLIANCE (US)

This device complies with Part 15 of the FCC Rules. Operation is subject to the following two conditions: (1) this device may not cause harmful interference, and (2) this device must accept any interference received, including interference that may cause undesired operation.

DISPOSAL AND RECYCLING

Do not dispose of this product as household waste. At end of life, take it to a designated collection point for recycling of electrical and electronic equipment. Contact your local authority for yournearest collection point.